Fence Clip Madness

Third side of fencing complete!This weekend’s progress included stretching a ~340′ section of fencing. My dad helped out this time. Here is a photo from up above by the house- you can’t really see much of the fencing, but it runs acrosss the field where the lightest mowed patch is. The shipping container is Neighbor Nick’s solution to his storage needs. Much of the background is neighbor Dick’s nursery tree crop. It’s really looking nice this time of year, many vibrant colors!

The fence stretching part goes pretty quick, I just tie off on one end post, unroll (this time, I got smart and used the tractor- I put the roll on a metal rod in the loader and backed up), tie the other end off to a metal tube, hook that to the tractor, and pull it until the tractor starts losing traction-that seems to be about the right tension. Then snip one horizontal wire at a time, wrap it around the end post, secure, and move on. When we got down to 3 wires, we slacked the tension, and then hand-tensioned each one of those using a fence stretcher. That took just a couple of hours.

T-post fence clip.Then came the hard part, that takes twice as long- the T-post “clippies!” Though only a few per post are required, I prefer to use more, to make the fence stay nice and flat- for aesthetic reasons mostly. So, I bet we put in a several hundred of those things on Saturday! My dad said his hands were cramping that night!

I have a couple of tools for twisting the clips, but my favorite one is the Fence Pro. It makes splendid looking clips, and is easy on the hands. The downside: it’s really easy to fling the tool a few yards by accident- and always, of course, on the opposite side of the fence from where you are working! And, the dang things get lost in the grass too easily, they embed in tall grass like Barbie-sized javelins, never to be spotted again. 🙁

I’ve ordered a couple more tonight, both to replace one that I lost, and also so I have more around to share when I have helpers. It’s nice to have a long one for good leverage, and also a half-sized one for tight spaces (you can cut them to your preferred length). It seems a little silly to pay $7.50 + S&H for such a simple thing, but I don’t begrudge the makers, this is indeed a fine tool!

My second favorite tool is the Wire Twist Tool from Kencove Farm Fence Supplies. It works great on the bottom clips that are near the ground. Kencove has a lot of really cool products and advice on their website and in their catalog. They have a good price on wire crimps, which saves me quite a bit compared to buying them five-to-a-packet at my local farm co-op. And, I like their slick (re-used, I think?) spice shaker bottles to hold them- no spewing crimps out of a bag onto the grass! I had some free web dollars to spend from a promotion, and I spent them all on fencing tools from Kencove! 🙂

Setting Fence Posts

I’ve been setting fence posts the last few weeks, getting ready to stretch another line of field fence. I’ve chosen to do a ratio of one wood post per 9 metal “T” posts. The wood posts are 4×4″ treated, and the T-posts are 8′ heavy duty ones, driven into the ground 3 feet. I’m spacing them 12′ apart. This seems to be strong enough, and balances economy of materials with the need for robust fencing. But, I feel very unsure about what the “right” numbers are, because there is so much varying advice and evidence of application.

One thing I do value is the ability of the fence to “spring” a little bit. Knowing that when working dogs, it’s possible livestock might, ah, occasionally get run into the fence full-boar with a young dog in hot pursuit, I don’t want it to be as hard as a brick wall when they hit it. That’ll either break the fence or break the animal, one of the two! This fence does seem to have good flex, but seems strong enough to resist my hardest pushing, and then some. I’ll report back if I regret any of my decisions once dogs and livestock put it to the test!

I’ve chosen to put concrete around the bottoms of the wood posts. This is a subject of debate for many too– concrete makes them a bear to get out, if you ever need to. And, it’s tough to say whether concrete concentrates water around the post more, making it rot sooner than well-drained soil would. But, the deciding factor for me was, my neighbor Bob, a long-time farmer, warned that if you don’t use concrete in the flood plain (which is where the pasture is), you could find your whole fence afloat when the water comes. He speaks from experience, apparently, so I’m going with his advice.

Anchor bolts at the bottom of a fence post.A handy tip I found in a book is to screw galvanized bolts about halfway into the posts where they will contact the concrete. This binds the concrete and post together, so that the post cannot slide or twist within its concrete shell. Here (left) is what I’ve been doing on the bottoms of my posts.

The wood posts are fairly easy to install since I have a post hole digger on the tractor. Tinkering with getting them aligned with the string line is the biggest hassle. The T-posts, I only drive in barely by hand using a fence post driver. When I have a whole line in, I mark the bottoms at 5′ tall, then drive along with the tractor, and push them in down to their marks using the tractor loader. My dad gave me that tip. They go in “like butter” this way, and it sure saves the hard labor of fence post driving!

Last Weekend’s Progress

Last weekend did prove fruitful for me, despite taking the break to host a family gathering, and all of us staying up late Saturday night around the campfire. Here’s the picnic table chore done:

 picnic table

I had some struggles with the Millstead kit missing some of the lumber, went back to Home Depot to get replacements, only to find the next kit we opened was also defective. So, they gave me a 2×2 and I cut my own mitered angles at home, which was annoying, since the whole point of a kit is to not have the hassle of getting out your saw and measuring things! Oh well, it still went together quickly enough to be ready for use the same day, I’m sure much more quickly than if I had built it from scratch, judging by how long the duck tractor took me. Kirk did the sanding and finishing, it turned out nice! We are enjoying eating on it in the nice weather we’ve been having.

I also got a whole line of fence posts done over the weekend, and finished up the H-braces during the week. So, that side of fence is ready to stretch-that’s Saturday’s task.

The baby ducks are growing, they are almost 4 weeks old. They have very “tweenie” feathers, and their markings continue to hold my interest, wondering how they’ll turn out! This isn’t a very good picture, it was getting dark when I took it…

Baby ducks 4 weeks old

Duck Incubation Plan: Rev B

I put more duck eggs in the new-and-improved incubator tonight. I spent the money to add the egg turner and fan options to my “stock” incubator. Now I think I’m invested over $100 in the thing! I have to make a lot of babies to pay for that! Here is tonight’s load, only 14 eggs over 2 weeks from 2 ducks (well, I broke one more):

Duck eggs in incubator.

Since I had such a poor hatch rate the first time, I’m stepping up with the added incubator features. I thought hand-turning was a pain, so the electric turner is a welcome convenience. The product’s literature warns that it’s not for duck eggs, which are large. But I gambled, and am finding they seem to fit fine, turn fine, and are not too close to the heating element. It might be a problem if it were full, however, they didn’t fit so well when I tried setting them next to each other.

The fan option is supposed to more evenly distribute the heat across all the eggs. This time, I’ll also be more careful about humidity, especially the last several days before the hatch. I plan to include wet sponges to supplement the water channels in the bottom of the foam box.

My reasons for incubating are twofold. First, I want to keep the hens laying- if they collect eggs for two weeks, set for four, then supervise babies for another month or two, that occupies them through peak laying season. Their job is partly to generate dog food ingredients to earn their keep, so I want them to keep laying. I have also decided that incubation and indoor-rearing make tame ducklings, which is much preferable to me. They are easier to manage and  handle, and more practical for their second job, which is being the subject of the dogs working on their herding skills. When I pet-sit my mom’s ducks, they are nearly suicidal when I approach them, crashing into the barn walls; and they are impossible to catch once they get loose in a panic.

The third job of the ducks has nothing to do with incubation, and that is to eat slugs! I am fairly afraid of slugs, that’s my one phobia, so I am thrilled that the ducks are so happy to eat them! It grosses me out to watch, however, as they struggle with a huge slime drool for quite a while after wolfing one down. So here’s hoping I’ll have 14 more slug eaters 28 days from now!

Local Small Scale Farming Resources

Volunteer clover and wheat in the pasture.Wazzu: Washington State University is our state’s “land grant” college, which means it was founded on agriculture and continues to be funded for that vein of research and education. Since I’m a WSU alum, I often receive mailings with news on current research being done there. I’ve been impressed with their commitment to study and further the movements of organic farming, crop rotation, bringing back heritage varieties of plants and animals, and other earth-friendly agricultural pursuits. Check out WSU’s Small Farms Team website or news on the WSU Agricultural Research Center.

Extension: WSU has “outreach” offices in every county in the state, called Cooperative Extension offices, that provide local resources, classes, and experts on livestock and plants, amongst other things. An interesting service they usually offer is bug identification and plant disease ID. The Extension system in my region has long-offered a “Master Gardener” education series, which trades volunteerism for extensive training in horticulture. Modeled after that, we now also have “Livestock Master” programs. The idea is, you take a series of classes for free to become a local expert, and in turn, volunteer your time to give back to the program afterward, so that the whole system is self-sustaining and propagates knowledge and networking.

Extension Offices also oversee the county 4-H programs, which are fabulous youth development programs that teach not only agricultural subjects, but many other things as well (dog training, motorcycles, computers and rocketry, to name a few!). 4-H is close to my heart, I was a member for 10 years growing up, and have many fond memories of the wealth of learning and experiences I enjoyed there. Most 4-Hers exhibit their year’s efforts at their local county fair, and those are great places to get to know other local farmers and ranchers and network with local associations.

Conservation Districts & NRCS: Snohomish Conservation District is the local (to me) branch of the Natural Resource Conservation Service (NRCS), a federal USDA program that, as its name implies, is committed to preserving our natural resources, and works closely with farmers. You can find your local Conservation District office here. These agencies offer many helpful service to local farmers, large-scale and small-scale.

My local office created a “farm plan” for me, that was custom-designed for my goals. They offer continual support if I have questions about anything farm-related, and can always connect me with experts on pasture management, fencing, floods, soils, noxious weeds, pesticides and herbicides, creating or restoring habitat, researching grant opportunities and the like. SCD’s newsletter features local farmers and their unique projects and ideas, and they arrange a lot of educational classes and contribute to the annual Snohomish County Focus on Farming conference. They also organize many farm tours throughout the year to highlight best practices and spread knowledge.

The interesting thing about NRCS is that they are a “neutral” body, not a regulatory one. So, when working with you, if they do find that you are in violation of some environmental code or law, they won’t “turn you in” or otherwise penalize you. Their job, rather, is to educate and encourage people to learn and do the right thing. So, they are considered a strong ally to and advocate for farmers, someone you can trust to help you, not “bust” you. This makes sense to me, as I believe most smaller scale farmers do love nature, animals, and the environment, and desire to do the right thing.

But, sometimes balancing law, especially law geared towards commercial enterprise and large-scale development, with the practicality of trying to make a living as a local farmer can be hard. I have sure run into some funny environmental laws and policies that really don’t make sense for my property or situation, and found the SCD to be exremely helpful in navigating these waters (no pun intended). They do a good job of bridging the gap between farmers and policy makers, to find solutions that make sense for everybody.

NABC: The Northwest Agriculture Business Center has a nice website that I visit often to read news and articles pertaining to local farming. They also list local classes being held. I love classes!

Oregon State U: OSU is Oregon’s land-grant college, which of course, oversees Oregon’s system of Extension Offices and the like, parallel to WSU’s role in Washington. They publish Oregon Small Farm News , an e-zine I really enjoy. It’s beautifully formatted and always contains a variety of great information and advice on farming activities in the Northwest. You can subscribe to it for free.

Fruit Salsa

My bowl of fruit salsa looked so nice this time, I thought to take a picture. Here’s my best stab at sharing the recipe; though I never measure and easily sub-in different ingredients depending on what’s available or in season. I think you can’t go wrong when blending fruits and veggies- they all go well together!

Chop and mix together:
Tomatoes (not too many of these, as they can overwhelm the fruit flavors)
Peppers: red, orange, yellow and/or green
Hot Peppers: serranos, jalepeños, red peppers- to taste. [If you like more heat, let  more of the seeds slip into the final product.]
White or yellow onion
Green onions
Apple (skin left on is ok)
Mango
Strawberries
Blueberries
Cilantro
–>Add Salt, pepper and lemon or lime juice to taste. The idea is to balance sweet, salty, tangy and spicy all together…

Fruit salsa goes great with white fish and rice cooked in coconut milk. It’s also good in wraps with the same coconut rice paired with chicken and a yogurt sauce. And, of course, it’s great for dipping tortilla chips too!

Saturday Plans

Ah, Saturday! I love the weekends, it’s so nice to be able to sleep in a bit (only til 7am today though!) and have two whole days ahead to get things done at home. This morning, I’m going to finish the ridge cap on the Duck Tractor and put all the tools away from building that. I like that step of a project, of putting everything away when it’s done.

Next, I am going to assemble a wood picnic table kit I bought at Home Depot. I debated on this one, the design is very simple, and the cost for the kit is about double the raw materials- $70 instead of maybe $35. But, it would take me several more hours to build one from scratch than to put this one together, and I have other things I want to get done. So, the kit it shall be today.

Kirk is hoping I’ll disposition one last pile of spare lumber, that’s covered in a very pathetic looking, and no longer waterproof, blue tarp. So, I’ll try to get that done to make him happy. (Well, it’ll make me happy too, to say goodbye to the last of the necessary, but tacky-looking, tarps that were in use during the phase of putting this place together. But, I have a higher tolerance for putting up with such things while I’m getting other things done, I might have left it there another year, who knows?) And, I want to squeeze in setting a wood fence post or two. And, clean house. Oh dear, you can see how that is slipping in priority (again)! 😮

This evening, my parents, siblings and sister’s kids are coming over for dinner. My parents both had birthdays last week, and tomorrow is Fathers’ Day. This will be the first time I’ve offered to host a family gathering here. The accommodations are still very spartan, to say the least. But for my family, I think they’ve concluded “beggars can’t be choosers”- my brother is currently between houses and “shacking” with the sis, and my sister and mom get weary of always hosting family events. So,  they’ll be glad to delegate to me, regardless of my lack of a formal parlour for house guests! 😉 And, as I’d hoped, the weather is supposed to be nice, so we can spill outside, my favorite place to be, enjoying the view and maybe a campfire of rotten barn wood.

On the menu: Appetizers shall be  tortilla chips & made-from-scratch fruit salsa, also crackers with a cream cheese covered with raspberry chipotle sauce (from a jar). Dinner is marinated flank steak on the BBQ, green beans and/or a green salad (I’ll see what looks best at the store today). My dad wanted to bring a Walleye fish they caught last weekend, but said there isn’t enough for a whole meal. To complement that, I’ll make basmati rice cooked in coconut milk, and use more of the fruit salsa-that’s my favorite combination for fish. For dessert, I ordered a cake <sigh>- I knew there wouldn’t be time to bake today; and I’ll serve it up with ice cream for good measure.

Wardeh’s “Use Less Plastic” Challenge

One of my favorite bloggers, Wardeh Harmon, has issued us a challenge: use less plastic. Check out her blog post to read all of her great reasons why. I don’t like plastic either: I worry about it leaching into my food, I don’t like that it increases demand for fossil fuels, or that even recycling it uses a lot of energy. It’s an amazing invention, and it has its place, for sure. But, it just doesn’t have a great score in the “carbon footprint” scale. So I have been trying to say “no” to it more, too.

And, I’m starting to reflect that many “old school” materials are just a lot more appealing: wood, glass, ceramic, brick, basket materials, cotton, hemp, wool, metal, stone- they look more pleasing, and feel nicer. I am trying to erradicate plastic in lots of places, especially from the yard, animal equipment, and food storage containers.

How can you give plastic the boot in your life? Take the challenge!

Fencing little by little

Wednesday night I got a wee bit of fencing prep done, I went out and measured and marked the post locations on a whole line. But then, I realized I made a math error (darn those, I seem to be challenged in that area) and had to re-do several of the marks. That’s annoying, trying to orange-spray-paint not-so-little notes to myself on roughly mowed grass, “Ignore this post marker, wrong spot, use that one over there…” Hopefully I can remember how to interpret my notations when I go back to place the posts!

I was also vexed to see that one of the wood brace posts I’d concreted-in had somehow shifted, it’s 2″ off the string line, and I had them SO perfect when I set them! Maybe some deer leaned up against it for an hour smoking a cigarette there, 😉 I don’t know; I can’t imagine how they could have moved! So, now I’m debating whether to ignore the flaw and let the fence be crooked there, or to add a 2″ board onto that post to fix the line. Hmm.

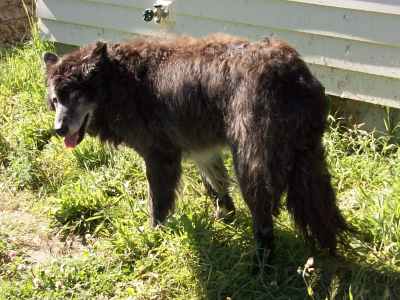
After this chore, and after wrestling Old Chessie back to the house (poor, senile dog, he tends to just wander, and fall down, in the field) we watched No Country for Old Men, a Cohen Brothers film. It was violent, which I don’t like, but still a good watch. They have such a weird style, it’s hard not to appreciate their oddity, I guess.

Duck Tractor Done

I finished the “duck tractor” (ala “chicken tractor”) last weekend– start-to-finish, including two shopping trips, over Saturday & Sunday. Ok, I need to do a little more trim-out still, it needs a ridge cap on the roof, and needs more staples on the chicken wire. But, it’s habitable, at least, so the ducks were able to “move out” on Sunday night! Phew! Here they are, settling into their new digs; read on for info on how I came up with this rig.

Baby ducklings inside their new tractor.

I’m fairly proud of my tractor design, I made it from scratch, and I think it looks pretty classy with a decidedly “northwest” architectural style! 🙂 I browsed the Web quite a bit looking for ideas, most of which are “chicken tractors”, not too many published ideas for ducks out there. I found a lot of nice ideas, but few people disclose their design details (lots of plans for sale, though). Here is a nice collection of chicken tractor photos compiled by the City Chicken website.

I needed to vary some from all the examples I saw. For one, I didn’t need to build nest boxes or perches, like one would need for chickens. Our weather is mild, and ducks are hardy, so they don’t need a plywood “house.” And two, I want to be able to walk inside the thing, to catch ducks, pick up eggs (which ducks often lay in random places), clean out, etc. Most of the designs I saw were only 4 feet high and 3-4 feet wide. If I had to crawl in there to grab a duck or a feed pan, I think my butt would get stuck! 😮

Yet, I appreciated the A-frame design of many I saw. A-frames use less lumber, arch designs are stronger and need less bracing than a “cube”, and the poultry don’t need headroom above a couple of feet. I also liked the whole “tractor” idea of making the structure move-able, with built-in handles and/or wheels. Since the farm is still in-planning, it’ll be nice to move the poultry houses around on a whim. They key is to make the tractor light enough to carry, but heavy enough that predators can’t slip under the bottom and wind won’t easily move it. So, that was my mission.

A-frames offer a mathematical challenge: that of calculating the dimensions of the sides and the corner angles. I wanted to maximize use of lumber, make it tall enough to walk in, but not so huge that it would be hard to move. Though I’m sure I calculated thousands of triangle dimensions in college, I’m sad to admit, I’d need a refresher to do trigonometry by hand now. So, I cheated, I used this handy online tool. I played around with the numbers, I knew I wanted the center peak to be about 6′ high, and I preferred the width to be around 4′ so it wouldn’t be unweildy (and so I could cut 8′ boards in half for that side). I wanted to render whole-number angles that I could set on my miter saw and which were easy to measure length-wise. What I came up with was an angle combination of 19° and 71°- not the most convenient measurements, yet I was able to make it work. It did make my brain hurt a little! 🙂

The most annoying part was that my miter saw only cuts angles up to 45°. So, to get those 71° jobbers, I had to set the saw to 19°, and butt the board up end-wise onto the saw. I imagine this probably violates safety advice for use of the saw or something. And it’s not real accurate, since the edge of the board doesn’t give enough contact with the back fence to ensure perpendicular alignment, and it’s hard to make sure the board doesn’t move. There is probably a much better way to do this, but it worked well enough for a duck pen, I just wouldn’t recommend this for finely-built custom cabinetry, by any means! Here is the start of the pen framework:

Bones of the tractor.

The pen is 8′ deep, 6′ tall, and 4′ wide, roughly. It’s exactly big enough for me to walk in (Kirk has to stoop). I made the rectangle floor from 2×4’s, then built up from there, making the ridge peak and diagonal sides from 2×2’s, threw in a couple of 1x4s for diagonal braces, screwing everything together, and then… the door. That part took me the longest, by far. You see, the pen is so narrow, I could not center a rectangular human-sized door, I had to use as much of the triangle as possible so I could fit through it. Yet, since I wanted it to hinge, and not slam shut when I let the door go, the hinges had to have a vertical side. Some people make these doors hinge from the bottom, flap-style, but I didn’t want to have to step over or onto a door laying on the ground. It occurs to me now that it might have been easier to make the door on a side panel, but I was fixated on making a “front” door at the time. So, here is what I came up with, this funky 5-sided door. Cutting the angles, and then assembling it was a bear, and then of course when I hung it, it sagged and bound with the frame, as doors and gates always like to do. Fortunately, a steep diagonal brace sorted that out (I wasn’t sure it would work at such a steep angle, but it did). Now it opens and closes flawlessly, with room to spare for swelling in wet weather.

Duck tractor frame with door & back wall.

I covered the front half with chicken wire, and the back half with corregated metal roofing screwed right into the braces-no heavy plywood required. The back wall is made of thin vertical cedar fence boards, so that the ducks will have a reasonable wind screen in the back. It has no floor, because the idea is for the poultry to eat the grass they’re on, and it’s easier to pick up and move that way, no bedding to scoop out first. I used treated lumber, along with the cedar, because I didn’t want to have to paint anything; I like the look of raw materials. The whole project cost just under $200, not too bad! Here are the fruits of the weekend’s labor:

 Finished product with roofing & chicken wire screen.

Kirk helped me move it, and it was pretty easy– the weight is perfect, light enough to move, heavy enough to sit still. The handles sticking out of the front make it slick for carrying travois-style, but I have to make a better handle for the back. For now, Kirk lifted it from the bottom, but that’s hard on the fingers, and will be dirty too. Maybe I’ll add wheels to the back.

The ducklings will need their heat lamp for several more weeks, that was easy to clamp onto the interior structure. They were pretty nervous in their new environment for a few minutes, the daddy duck strutted outside threateningly, and the collies immediately race-tracked around it. Despite all that scary stuff, the babies settled in soon and started enjoying the clover, tackled emptying the water tower with vigor, then snuggled under the lamp for the night. Then I had to clean up the mess in their cage upstairs, oh boy, shovels full of shavings soaked with about 10 gallons of water. Two weeks in the house is too long, I think!