Clasidog raised some good points about dog feeding that I’d like to address further with a new post.
First, I think it’s important to acknowledge that nobody really knows what to feed dogs. We lack scientific data and studies to guide us. Even some of AAFCO’s guidelines are based on dubious research, such as studies on hogs and mice, conjectured to the needs of the domestic dog and cat. And, many of AAFCO’s studies are based more on what’s required for the bare minimum of survival, not necessarily what’s optimal for ideal health. Most of their studies are also very short-term, just a few weeks or months, there is not much good evidence available on long-term health affects of any particular dog diet. And this is where nutrition’s affects are most important: we may feel OK eating fast food burgers for a few days, but if we eat them daily for a lifetime, we know we’re headed for trouble!
Not to mention, I think we can conclude that what’s good for one individual may not be good for the next. Even if we did have plentiful research, it would still be impossible to quantify the optimal “complete and balanced” diet for an entire population-just look at the diversity of opinions on human diets! So, it is my feeling that we are all left wondering how to best nourish dogs in general, and our own unique dogs. Thus we must develop our own conclusions and assumptions, and this is very subjective indeed!
Here are some of the conclusions that I have come to, personally. First, I have come to believe that dogs are not very much like their wolf ancestors at all, but instead are a species that is specifically evolved and adapted to scavenge off of human society’s waste. A variety of readings and personal experience have led me to this conclusion, but my favorite book on the subject is Raymond & Lorna Coppinger’s Dogs: A Startling New Understanding of Canine Origin, Behavior & Evolution.
Scavengers, by nature, are adept at thriving off of very poor nutrition sources and a wide range of foodstuffs. Many people try to mimic a carnivore diet for their domestic dogs, but I think this may be misguided—there is much evidence to suggest that dogs have an evolutionary history of, and show mostly physical traits of a scavenger, not a carnivore. So, a wolf’s nearly pure-protein diet may actually not be what dogs are designed by nature to eat. On the contrary, feral dogs do quite well in South America, Africa and even here in the U.S., living off of and in garbage dumps.
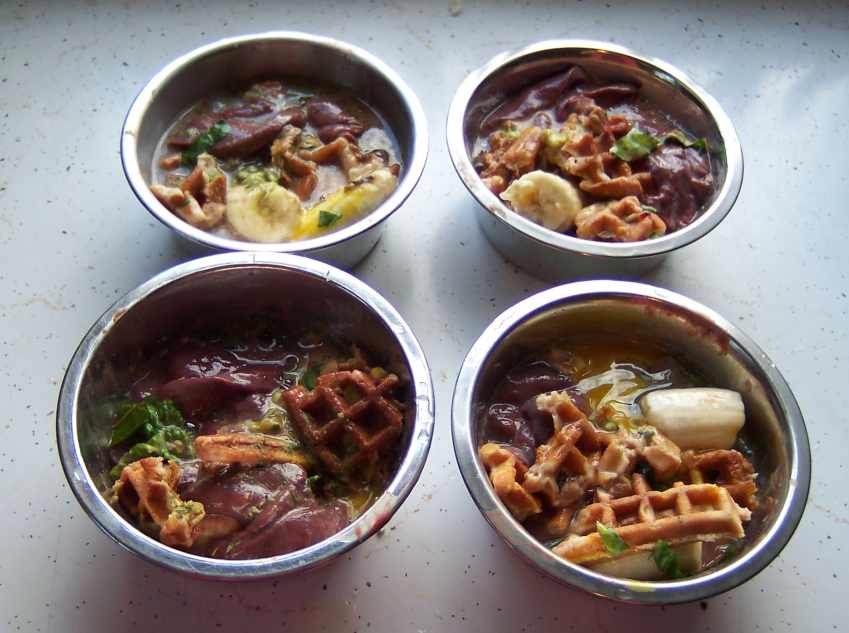
I believe this reality can give us comfort that we almost can’t go wrong, from a nutritional standpoint, in feeding dogs. Just about anything we offer them should be better than a scavenger’s native diet, which is literally trash! But, of course, we don’t want our pets to merely survive, we’d rather they live optimally. I feel that the most important way to ensure that each individual gets what his unique body needs is variety, high quality, highly digestible, and natural food. So, that’s what I shoot for when feeding my dogs.
It may be important to distinguish between “leftovers” and “table scraps.” The former, I would define as food that I would normally eat, so is fit for human consumption. I eat a reasonably healthy diet, so anything that’s left over from my table is probably pretty good for the dogs, too. Though, I do feel that dogs can tolerate a much higher bacteria load than humans can, their stomach is much more acidic, and their digestive tract much quicker to do its work. So I would be comfortable feeding my to dogs food which I may consider a day or two too old for my own touchy human digestive system!
Table scraps, on the other hand, I would define as the byproducts of the household kitchen that are considered not fit for human consumption- loads of grease, fat, trimmings, spoiled vegetables, or other raw materials that we reject during our food preparation process. This definition, I think, is what veterinarians have tried to preach for decades, that “table scraps” are not too good for dogs. If you absolutely wouldn’t eat it on your hungriest day, why would you give it to the dog?
Yet, I would suggest that most commercial dog food is made from just that—byproducts of the human food chain. That’s what makes it affordable, despite all the industry that goes into processing, packaging, shipping and marketing it! How else can you buy such materials for a few dollars per pound, dry weight, unless it is truly junk?
When you consider how costly decent beef jerky is-about $20/pound at my local butcher- it becomes plain: dehydrating quality fresh ingredients renders a very costly product, by weight. If dog food is only $2/pound dry weight, the vendor must have had to pay pennies per pound for the original ingredients to still make a profit. What, I ask, can you get for pennies per pound, even buying by the ton? Certainly not quality muscle and organ meat! Not even good cereal grains come that cheap!
So, I might assert, if you are paying less than $10 per pound dry weight for your pet food, you might wonder what it was made from that they could sell it to you, at a profit, for so little. And even if you are paying that much, it would be hard to know if the ingredients warrant that, or if the manufacturer just has you fooled, and they are making a vast profit off the same waste everyone else is marketing. But, since we know dogs are evolved to survive on garbage, it’s no wonder that many dogs manage to do alright on re-marketed byproducts on the store shelf. I think that traditional commercial pet food is the ultimate testament to how thrifty the domestic dog really is.
The other thing that I think needs differentiation is: fat. Because we humans are particularly vulnerable to getting fat from eating fat, we tend to assume the same is true for dogs. And, veterinarians report seeing cases of pancreatitis in dogs whose well-meaning owners top off every pet meal with a big dollop of cooked grease from the kitchen.
Yet, from what I’ve read, dogs metabolize fat into energy much more successfully than humans, so they actually can handle, and do well on, a fairly high-fat diet. And, I think the key is that most of the fat should be in its native form- either raw animal fat from healthy animals, or vegetable oil- not kitchen grease. I actually seek out higher fat meat for my dogs, and add oil to every meal. I believe this keeps their skin and coat vital, which is critical to overall health.
My mother remembers in her childhood, commercial dog food was just becoming popular, but her family couldn’t afford it. They always fed their family dog “extras” from the kitchen, and he was in optimal health and lived a long life, even after having recovered from contracting distemper as a pup! My now-deceased great uncle also recalled to me that in the “olden days” they used to home-prepare all of the food for their kennel of home-bred hunting dogs, and were very successful with this. I have also read many writings from dog kennel managers in the early 1900’s describing the meals they prepared for their show dogs—all homemade from locally available ingredients!
Commercial dog food has only been “on the scene” since about the Fifties, and only ever became wildly popular here in the U.S.And, we can hardly claim that dogs nowadays in our country are healthier on their commercial diets- quite the contrary. More dogs exhibit signs of disease than ever- allergies, dental disease, behavior problems, etc. Ian Billinghurst, in his book Give Your Dog a Bone, asserts that the U.S. has much more incidence of chronic canine disease than in Australia, where commercial pet food never really caught on.Not only is most commercial food made from poor ingredients, it is over-processed, with too many chemical preservatives and non-digestible vitamins added at the end of manufacture. And, most foods contain the same 10-20 basic ingredients, there is little variety. I just can’t see how this is an optimal way to feed anything, as compared to using a range of dozens of fresh, whole-food ingredients.
So, it seems, what comes around goes around, and many people are returning to just making their own dog food and seeing how well dogs do on basic food: meat, vegetables, grain. I think that pet food manufacturers have done an excellent job of marketing the idea that we’re incapable of making balanced meals for our dogs. Even most veterinarians seem to buy this logic (though, it’s possible this happens because dog food companies often fund or provide professors to teach nutrition in veterinary colleges- a sad conflict-of-interest situation).
If you fear this same fear, I would pose this question: do you feel qualified to raise and nourish a human child? How do you know he gets enough niacin each day? Vitamin C? What form of Vitamin C? What is the calcium-to-phosphorous ratio in his meals? What is the ratio of meat-to-grain, grain-to-vegetable in his meals? If a company advertised to you that they had created a one-a-day brick of food that was the most complete-and-balanced meal you could offer your child, would you buy it? Would you believe it? Of course that’s ridiculous; we know that as long as you provide your child a wide variety of quality whole foods, he’ll do fine! And that some processed lump of conglomerate ingredients and chemically-derived nutrients, with no day-to-day variety, would be a poor choice for you baby. Now, why would your dog, another omnivore, be any more complicated than your own kids?