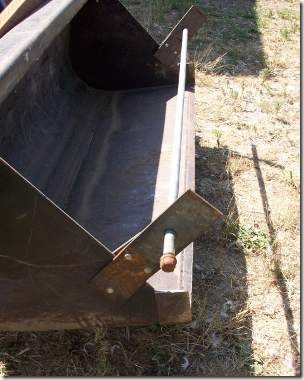
Last weekend I stretched the first line of fencing in the second pasture. Last summer my dad made me a bracket and rod system for the tractor loader, to help unroll field fencing. There are also systems made to unroll off the back of the tractor, hooking onto the PTO connection. But this one is much cheaper and simpler. It works great. And I imagine it’s a bit easier on your neck, to be able to sit facing forward and visually monitor the fence unrolling; versus having to constantly look behind you if you are towing it instead. 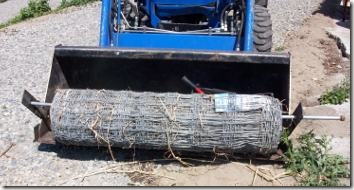
To start a new line of fencing, I first tied off one side to an H-brace. I have several do-dads for twisting the end of the wire back on itself, and I like three of them well enough to keep them all in my pocket and switch between them as needed: the Kencove wire twist tool, the Kencove splicing tool, and the FencePro tool.
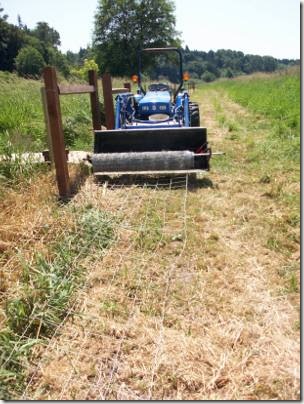
Once its tied off to the first post, then it’s just a matter of backing up the tractor to stretch it along the post line.
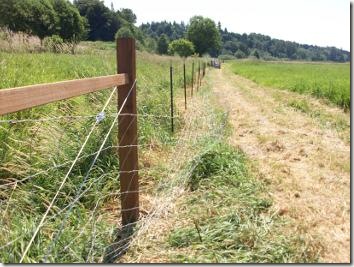
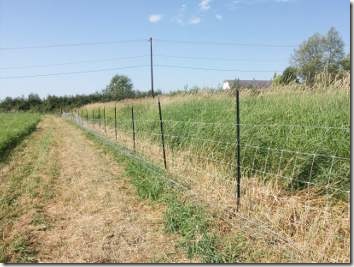
Here is what it looks like when a whole line is unrolled. It’s pretty slack at this point, but that’s ok.
Next it’s time to tension the wire. I fiddled around with this much longer than I’d hoped, as I’d lost the hang of it since last summer. And, I was using a new fence gripper tool that took me a while to figure out.
I find that the challenge is getting the fence pulled perfectly straight off the end of the H-brace, with the tension pulling right along the plane of the fence line. If it’s allowed to be some small distance away from the posts, even a foot or so, it’s just too hard to push it close enough to get it attached. But because there is a deep ditch on the other side of this fence, I can’t just drive the tractor centered along the tension line to pull the fence tight.
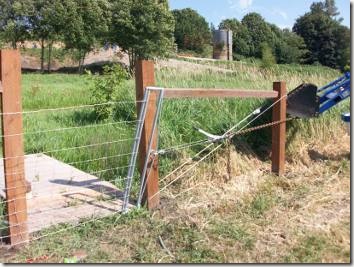
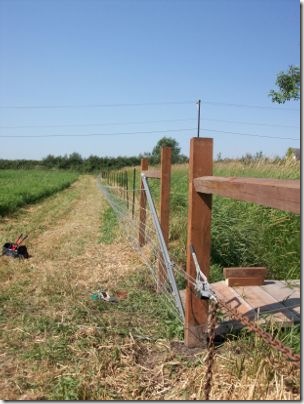
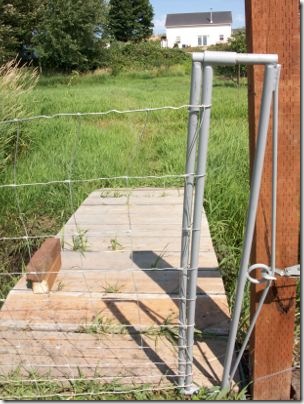
I finally settled on this arrangement: extending the tractor bucket into the plane of the fencing, beyond where this line ends (there is four foot man-gate opening, and then an H-brace for the next section of wire), and just parking the tractor there as a dead weight. I put a chain around the bucket, hooked a ratchet come-along to that, and hooked that to the fence gripper tool.
Then I ratcheted the whole thing until the wire just started to stand up. I find it’s not necessary to get it that tight, or even get it to stand up all the way. Once you start clipping it to the posts, that will put a lot more tension on it. If it’s over-tightened at this point, that can make it too hard to affix the line to the posts. And there is risk of over-tensioning this wire, which could over-strain it in colder times when it shrinks, or if a crazed animal ever runs into it at full speed. The fence line definitely needs to be elastic.
I was pretty pleased with this new tool that grips field fencing for stretching. Before I had used a sort of long tube with hooks on on side and a ring on the other. But I found it doesn’t work with field fencing- it just keeps pulling the vertical stays and bunching them up, they are not fixed enough to withstand the tension. I could make the tool work by tying off the fencing onto the tube part of the tool, but it was tedious.
I spotted this one on sale at the local feed store, it was about $100 originally, marked down to $60 because it wasn’t a hot seller. I think everyone else must have felt like I did- nice tool, but hard to justify the price, since you don’t use it that much. And you can make a free one out of some scrap 2x4s and bolts. But, I bit on the sale price, and I’m glad. It’s slick. It sandwiches the wire neatly with little effort, to give a nice uniform tension along the length, and it seems pretty secure. When you are done, the scrap wire comes right out.
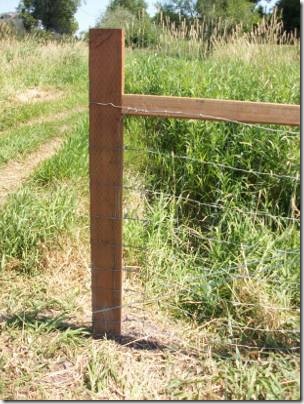
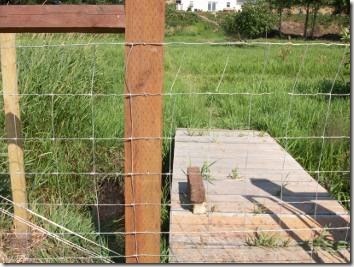
Once the fence was under tension, then I stapled all of the horizontal wires tight to the end post. Along the fence line, you don’t want to staple tight, to allow the wire to slide back and forth under the forces put upon it. But on the end it doesn’t matter, this wire isn’t going to move here. Stapling it at this stage kept me from struggling to hold it tight against the post, and keeps the wire from losing too much tension when I cut it. The weight of the wire makes the whole thing want to lay down, instead of standing up straight at this point. This is several hundred pounds of fencing wire, so of course its reluctant to stand vertically.
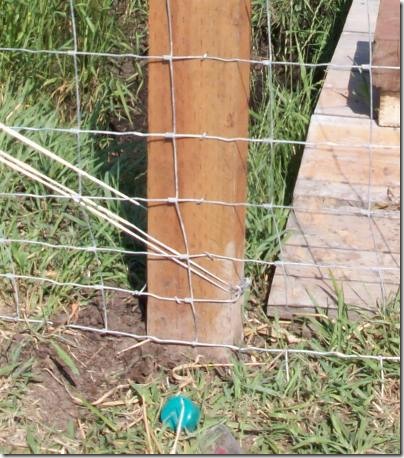
Once it was tight against the post, then I’d snip one horizontal wire at a time, and tie it off. In the picture below, I’ve started with the second one up from the bottom. You can see I’ve brought it around the post, and wrapped it back around itself on the left side of the post.
I did the top and bottom wires last, since they are stronger, they can hold the tension of the whole fence while you’re working. And also, they are stiffer, so it never seems possible to really tension them tight around the post anyway. So, doing them last allows for the rest of the wires to hold most of the tension once the last wire is cut, since the whole thing lets down a little bit, as the newly tied off wires absorb the tension that was previously held by the stretcher tool and the wires tied to it.
At this point, the fence still looks somewhat slack, but again, that’s just because it’s so heavy; it still needs more forces to bring it completely upright. A lot of force. The next step is to staple it to any wood line posts, to let them start to help carry the weight and keep it vertical. I have found in the past that it can help to use the tractor bucket to push or pull the wire in the direction it needs to go, to save having to do it with your body. But, I couldn’t do that this time, as the tractor was already broken by this point (but that’s another story). So I had to use my “brute” strength, pushing it up and against the posts with my shoulder and my legs, and holding it there while I attached it. I always get a lot of bruises doing this part, it’s kind of like playing twister with the fence; holding it still with one body part while trying to get it stapled or clipped off using both hands.
The last step was putting on what seemed like a million T-post clips. Truly, only three clips per post are required. But I prefer to do a lot more, purely for aesthetic reasons, as I don’t like the look of the way field fence will fold down in some spots if it’s running over uneven ground. So I clip almost every horizontal wire. Isn’t that crazy? But it does look nice when it’s done.
For the T-post clips, I use almost solely the FencePro tool. For as simple of a design as it is, I feel it works the best. I even tried a new tool this time, the Tie Wrench. But I couldn’t make it work at all- though the illustrations look great, it didn’t seem to have the right dimensions for the clips I use. I’ll study it again and give it one more chance. But I think the FencePro may still be the winner. I just have to be very, very careful to not fling it into the long grass, or it’s impossible to find.
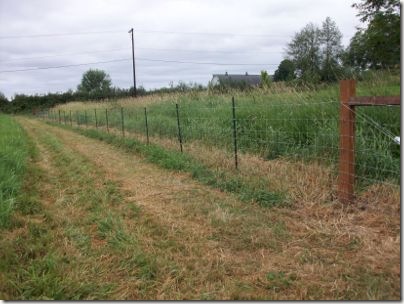
Here is the finished product, one section of about 300 feet done! I have the posts ready for the rest of that side of the pasture, but I ran out of wire, and the tractor broke. But I’m back in business now, the tractor is back, I have more materials, so I’m ready to spend the weekend fencing!
i’ve got a chain hook welded to the top center of my bucket, and hook my fence to that for tensioning. You curl the bucket and have pretty precise control of how much tension you’re putting the fence under. If you curl it all the way, and the fence is still slack, uncurl the bucket, back the tractor up 6″ and curl it again.
For tightening field fence I put kinks in the top wire with a pair of linemans pliers — grab the wire, twist it vertical, repeat. each twist takes up a quarter inch or so of fence, and you can tighten the fence between posts and stretch points that way.
Funny that we’re both doing fencing now. Seems to be the season.
Bruce, I love the idea of a hook on the tractor bucket- I could use that in so many ways! I am always using the bucket to yank out or on something.
I am still struggling with the easiest way to tension the fence when I can’t get the tractor fairly centered on the tension line. I am fencing so close to the ditches, I don’t dare drive it right on the edge. I have a nightmarish vision of dumping the tractor into a ditch, and what a mess it would be to get it back out!
I have an inexpensive tool for putting tension crimps in fences- it seems to work like you describe. It works great for tightening up funnly little areas that went slack for some reason.
Yes, it must be fencing season. I noticed this last year too– all the big box stores have their fencing materials stripped from the shelves, and it’s hard to get what you need. I was painfully reminded that I need to think ahead when I waited 2 weeks to get more rolls of field fencing from my local store. If I would have know it was going to take them so long, I would have driven to another store.
Ah, well, so I learned my lesson, and bought a whole truckload of posts and rolls of wire this time, so I have enough to finish the entire pasture. It was good exercise for the Home Dome guys to have to help me load all of that! 🙂
Michelle
if you’re going to have a hook welded, have 3 of them welded. One one each side, one in the center. The two outside hooks are handy when you want to suspend a load. I’ve got a diesel tank that I put into the back of my pickup and if I hook it up across the bucket i don’t have to deal with it spinning when i’m loading it.
I can’t tell if your bucket is plate across the top, that is, if the top of the bucket is a single sheet of plate. if so, to make it stronger for the hooks, weld a piece of pipe across the top on the inside of the bucket. It won’t change the use of the bucket but will make it much stronger for the weight on the chain hook.
took a closer look at the pics, looks like the top edge is reinforced. Hooks on each edge also are handy for stretching the fence. drive up and stick the bucket into the line of the fence as you did, attach to the appropriate hook, curl and stretch.
Nicely illustrated and information filled post. Some good tips too!
Can you contact me I am interested in questioning you about your fence strecher and where to purchase one.
Hi Gene, you can find a fence stretcher at almost any farm supply store that sells fencing materials, hope that helps!