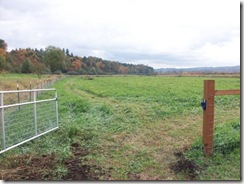
 I don’t like to count a task finished until I’m really done- tools put away and everything. But I can pretty much say I’m done fencing the center field. At least, I was able to move the sheep into it at the end of September. I had a few lingering details left to finish, like filling in some nasty ankle-twister holes in the field and adjusting a gate that didn’t ride smoothly. I’ve done those now.
Category: Home Improvement
Insulating the Innards of Antique Weighted Windows
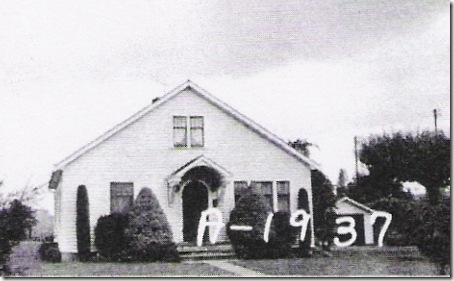 The front of our house used to have three side-by-side wood-framed windows, as can be seen by this 1937 tax photo I found in the county Assessor records. In the eighties, a prior owner had them replaced with a bay window.
Continue reading “Insulating the Innards of Antique Weighted Windows”
New Refrigerator
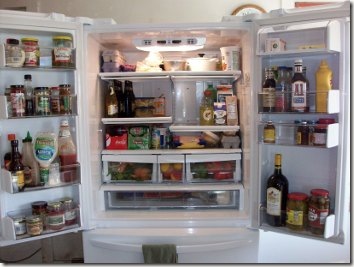
We bought a new refrigerator last week, and boy what a luxury it is! Our old fridge was only 18 cubic feet, the classic style with the freezer on top. We chose a new LG brand, 25 cf, with “French door” style doors, and the freezer on the bottom as a drawer. The thinking goes, you don’t open the freezer a lot, so why put it at eye level and the most convenient location; while you constantly have to stoop to reach the often-accessed produce drawers at the bottom of the fridge? Continue reading “New Refrigerator”
Fancy New Dog Potty Yard

The new dog yard is finished! We plan to eventually build a large deck on this side of the house, so we wanted to choose fencing materials that would be complimentary to a cedar deck design. So, we used tight-knot cedar 4×4 posts, and cedar 2×4 rails. We did not get these at the “big box” store- these came from a local lumber yard, and the wood is beautiful, nearly flawless, and straight (but was also expensive!). Continue reading “Fancy New Dog Potty Yard”
Goodbye Old Dog Potty Yard

In 2006, when the house was being moved and rebuilt, it was necessary to move the dogs from my old house in town out to the farm. I needed to get the old house ready to sell, and not have four Border Collies greet potential buyers at the door! With many things going on and lots of money being spent, I had to make a lot of quick choices on getting things done efficiently and cheaply, rather than well. 😐 The dogs’ potty yard was one of those things.  Continue reading “Goodbye Old Dog Potty Yard”
Historic Craftsman Porch Restoration
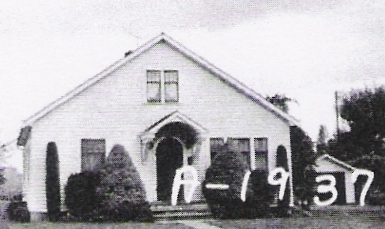
Our house has a peculiar combination of architectural styles. It was mostly a basic cottage, originally, built around 1929 (1937 tax photo above). But when it was moved to this site, I added a taller second story, which made it look more like a Farmhouse-style house. Yet tacked onto the front of it is a decidedly Craftsman porch overhang, even though there isn’t much else Craftsman about the house. Continue reading “Historic Craftsman Porch Restoration”
New Bridge
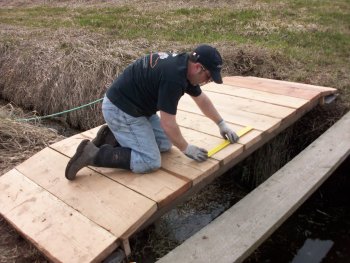 Kirk has been working on this bridge the last few weeks. It is made out of more barn wood-these boards were floor joists from the second story. The boards are huge and heavy, 2×12″ true dimension lumber, and sometimes bigger. The wood from the barn is funny, we know it was milled on site, and there are many inconsistent dimensions of lumber. When building something like this, it’s necessary to pick through the boards to find ones that are the same.
We have two drainage ditches that stretch across our pasture. There are culverts on one end of the pasture where you can cross the ditches, but they’re by the road. Last summer, Kirk drug a few of these barn joists down to the field to use as temporary bridges over the ditches. This way, we could walk straight across the fields, through the middle, which is a straighter path from the house. But, the bridges were a bit risky- narrow and often slippery.
So here is his more permanent solution. This is the first one, he plans to start the second one soon. This barn lumber was very dark from over 100 years of weathering- it was never stained or painted. He ran it through the planer, and it’s amazing how just shaving off a few millimeters, it looks as clean as fresh-cut lumber! He is finishing it with Varathane, so it will be pretty fancy!
The old bridge is in the picture- this new one will be a bit safer for walking on when our hands our full of stuff!
New Wood Stove
 Our new wood stove was installed last week, but we can’t use it yet, as it’s missing the heat shield, which is on back-order. Kirk is chomping at the bit to use it, he has a whole stack of barn wood drying under a tarp, just waiting to get in that stove!
Our friends made the hearth, we think it turned out really well. We accidentally chipped the front of it bringing it in, but they will come and repair it. They made it out of a wood structure underneath, covered by cement backerboard, and then their own proprietary mix of cement and some other mystery stuff. They colored it to look like slate, which was our request, to match the black stove.
Deciding on its shape was tricky: as you can see, it comes right up to the trim on the French doors on the right, but then has a longer wall on the left. Our first attempt at the pattern, we drew a circle with the center being the corner of the wall. But we couldn’t make that address the clearance requirements in the front without having it encroach on the doorway and the room too much. Next we tried having the circle’s center abut 12″ out from the corner, but of course, still equidistant from both walls, thinking it needed to be symmetrical.
But, it turned out, it didn’t look symmetrical, even though it was; because the long wall on the left created a visually imbalanced corner. So, we moved the circle center about 6″ to the left. If you study it closely, you can see this, that the circle arcs in more tightly on the right- it is not centered. But, we ended up with the look we wanted- it now seems to be balanced in the corner, oddly enough. Whereas before when it was truly centered, it appeared to be noticeably “off.” It’s funny how the eye can get confused.
We were relieved to get the hearth and see it work there in the corner– it’s always hard to be sure when using a paper template if you really have it right or not, or to envision how that’s going to translate into a real object. We are pleased with the result, the circle joins perfectly to the edge of the door trim. We will change these French doors later to be the style that open outside, instead of in. But, for now, we never use that left-hand door, so there is no risk of it whacking the hearth.
Kirk also sanded and refinishing the floor about a foot out from where the hearth would go. He was figuring, rightly so, that it would be a pain to sand up to that rounded edge later. The type of finish we put down is blend-able; so when we do the rest of the floor later, it should meet up just fine.
Wood Stove Plans
 We are getting a wood stove. This was Kirk’s idea, mostly. I liked the idea of having one, but may not have tackled the project for a long time. But Kirk has been burning a lot of the old barn wood, and feeling badly that it could be better used to heat the house, instead of just for recreational burning. And, I think he just likes to burn! 😉 So, he organized a bid from a local fireplace store. We did not get multiple bids, because we know enough about this place to know they are good, and they are local. The price was reasonable, and we liked their stoves.
The hard part was deciding where the stove should go. Our old 1929 house has kind of a weird floor plan. A previous owner had a wood stove in the living room, but this made a stovepipe go up directly in the middle of the upstairs bedroom, which we did not desire. We ended up choosing to sacrifice some space in the was-dining room. This room was eaten up by the winder staircase that was added more recently, anyway, so it no longer has enough floor space to act like a dining room.
It’s really become more of a strange foyer, I guess; since there are French doors exiting this room that we use constantly as a farm in-and-out door. This, unfortunately, brings a lot of dirt into the central part of the house (as can be seen in the photo!). Eventually, we’d like to repair the laundry room door (which is currently stuck shut) such that we can use that as the dirty farm door access, and leave our piles of boots in there. I think in the end, our floor plan will turn out to be very practical, if not unconventional. But, right now, everything in the house is just weird.
So, back to the stove. The floors are all old-growth fir, and we’ll eventually get around to refinishing them. We were tasked with choosing a hearth pad before the stove is delivered and installed. We considered the prefabricated ones the stove place sells. But, they were very boring tile jobs, with huge, unattractive grout lines. We wanted something a little more original. We honestly considered pouring some kind of concrete pad right on the floor, and a little web searching led us to believe this is a realistic option.
But, Kirk has a friend who does a lot of different fireplace design artwork, I guess you could call it. We ended up deciding to have this man make us a custom hearth pad. He makes his projects out of wood (in this case, 2×4’s, plywood and cement backer board), and then covers them with some kind of concrete product he has developed. It’s kind of a stucco look. We made him a paper pattern, and told him we wanted it to be slate-colored (to compliment the enable black vintage-looking stove); we’ll see what he comes up with!
This is a corner installation, and we settled on a round-shaped hearth. It had to arc back tight enough to not interfere with the French doors. But, of course, there are specs on how far out it must come from the front of the stove. So it was tricky figuring out what kind of circle arc to use. We ended up making the center of the circle offset from the corner and not 45° out of the corner. Oddly, a non-centered circle looked best in this corner, since the sides are not symmetrical– with a door on one side, and a plain wall on the other.
The picture shows some tape lines on the floor of different options we considered. We thought about embedding tile into the wood floor and running it in front of the door. But, we were a little afraid to make such a bold alteration, as it would have made a lot of work to change our minds later and put the fir floor back! And, our friend’s heath pad, we think, will give the stove more centerpiece attention and hopefully echo the rounded nature of the winder staircase we eventually plan to build.
